Letter e microscope lab. Answer Key Lab Microscopes and Cells 2023-01-06
Letter e microscope lab Rating:
7,8/10
1706
reviews
The letter "e" microscope lab is a unique and exciting way to learn about the structure and function of different cells and tissues in the human body. Using a microscope, students are able to examine the small details of these cells and tissues, and gain a deeper understanding of how they function within the body.
The first step in the letter "e" microscope lab is to prepare the samples for examination. This involves taking a small piece of tissue or cell, and placing it on a microscope slide. The slide is then placed under the microscope, and the student is able to view the sample through the eyepiece.
One of the most interesting things about the letter "e" microscope lab is the way that it allows students to see the details of the cells and tissues in such great detail. The microscope magnifies the sample many times, allowing students to see the tiny structures within the cells, such as the nucleus, cytoplasm, and organelles.
In addition to examining the structure of the cells and tissues, students are also able to learn about their function. For example, they may be able to see how different cells are specialized to perform different tasks, such as muscle cells that are responsible for movement, or nerve cells that transmit information throughout the body.
Overall, the letter "e" microscope lab is a valuable educational tool that allows students to gain a deeper understanding of the structure and function of cells and tissues in the human body. By examining these samples under the microscope, students are able to see the complexity and beauty of the human body at a microscopic level, and gain a greater appreciation for the way that our bodies function.
Letter e lab
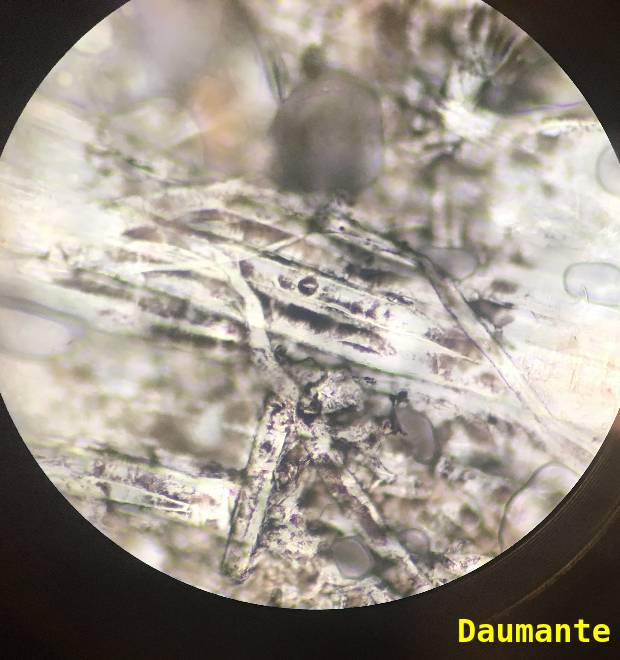
You can take a closer look at the cells, also called lenticels, of a piece of cork by following these instructions. The order is different for different slides. T he cells surrounding the central vein of the leaf are what you will want to look at; depending on the size of the leaf, you might have to cut the slice again so that the central part is the part you will actually see on your slide. Hooke, wanted to go over the microscope first before we went to the laboratory. The most effective way to do this is by using conversion factors and canceling units. Examine the images of the e slides and draw them to scale. What could she see instead? As you rotate the fine focus, different strands will go out of focus while others will become more sharply focused.
This is a great microscope activity for junior high to high school age. To see details of the amazing structure of plants, use the 40x objective and scan each slide, carefully observing all of the parts and different cells. Then, being careful not to move the cork around, lower the coverslip without trapping any air bubbles beneath it. With a large depth of field, all of the threads can be in focused at the same time. Use the corner of a paper towel to blot up any excess water at the edges of the coverslip.
She tapped her nose again and then I finally got it. In order to view the other threads, you must focus downward to view the ones underneath and upward to view the ones that are above. Was this some kind of a code!? What is the order from top to bottom? Which objective is the shortest? What knob is used to focus the microscope with high power objective? I thought the microscope was broken, so I called Mrs. It does not have as great of a magnification, usually about 4x. Your microscope has four objectives of varying magnifications 4x, 10x, 40x, and 100x mounted on a revolving nosepiece.
What knob is used to focus the microscope with the scanning and low power objective? Use the coarse knob to bring it back into focus. When you move the slide away from you on the stage, what direction does the image appear to move? Now look at it again with the 10x objective. View the slide under scanning and then low power. What can you tell about printed material from this experiment? I turned the nosepiece and heard the objective snap into place. Parfocal means that once you have focused on an object using one objective, the microscope will still be coarsely focused when you switch to a different objective. Hooke nodded and gave us instructions to head over to lab and find a microscope.
You are tasked to go to the junior high and help students use the microscope. Under experimental conditions all observations have thus far confirmed the theory. You should only need to rotate it a little bit to bring the slide back into focus, so turn the knob slowly. Parcentered means that if you centered your slide while using one objective, it should still be centered even when you switch to another objective. Each slide had a different thread order. It was later known that the cells in cork are only empty because the living matter that once occupied them has died and left behind tiny pockets of air. Which color thread is on top? The lens that you look through is the ocular paired in binocular scopes ; the lens that focuses on the specimen is the objective.
Click here to print out copies of the. You should hear it click into place. Determine which thread is on top by lowering your stage all the way, then slowly raising it until the thread comes into focus. There was one question that really stumped everyone. Compare this to what you see through the eyepiece.
Gently set the slice of cork on top of the drop of water tweezers might be helpful for this. With low magnification all the threads and levels were in focus, but with high magnification only part of the plane of focus one thread was in focus. Include information about the slide such as the date, what it is, the magnification level used, and perhaps even a drawing. Our printable Microscope Observation worksheets will help you keep track of the things that you study with your microscope and remember what you have learned. Blanks are provided for recording general information about each slide, such as the date it was prepared and the stains used, as well as space to write down your observations and circles to do sketches of what you see. You can also look at threads or fibers from furniture, rugs or clothing from around your house.
Microscope Lab Experiments: An Introduction to the Microscope
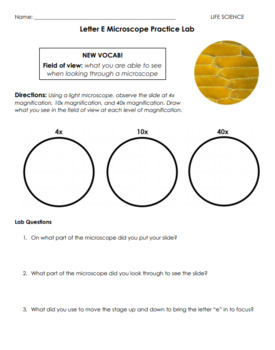
Focusing on the specimen is achieved by knobs that move the stage up and down, so that it is closer or farther from the objective. Label each slide and view them one at a time with your microscope experimenting with different magnification. Positioning the specimen requires that you turn the mechanical stage cont r ols , which operate the slide bracket on the surface of the stage. You should draw it to scale, meaning it should take up as much of the circle in your drawing as it does when you view it. Include a scale bar in your drawing. It seemed like it was something that rotated. You are tasked to go to the junior high and help students there use the light microscope.
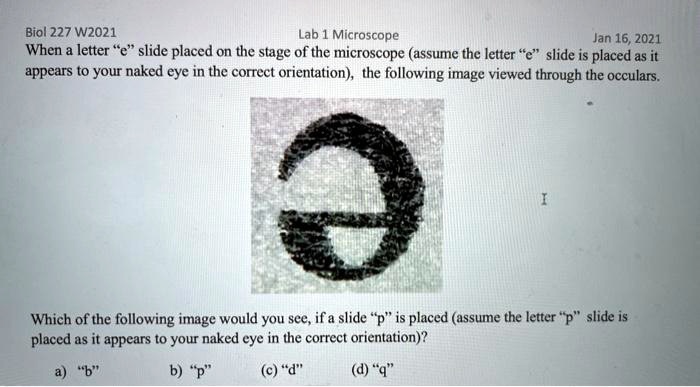
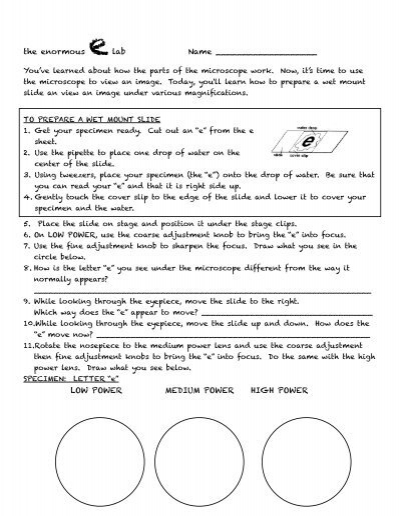
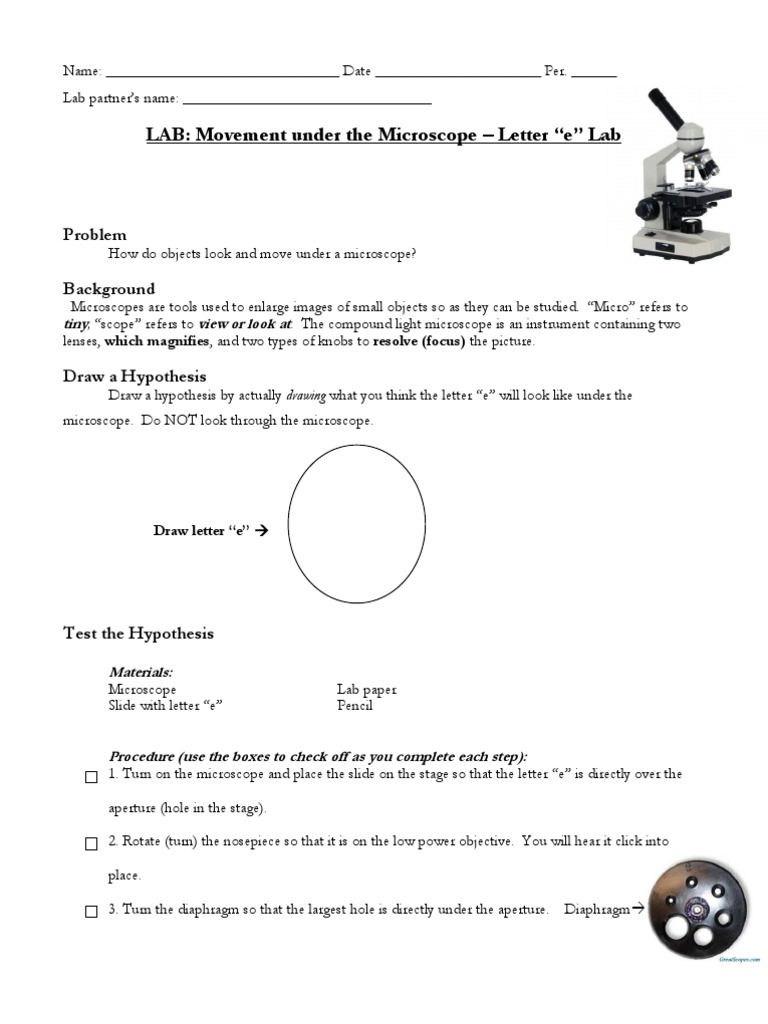
In class, we looked at a slide with newsprint of the letter "e". You should note that you could only focus on one colored thread at one time. The first thread to come into focus is the one on top. Which thread is on top? This will smear the cells along the slide, making a layer thin enough to view clearly. What part of the microscope do you look into? When I did that, the line moved in a circle. Use the scanning objective to view the letter and use the coarse knob to focus.
View the specimen on the sterescope 1-2 will be placed in the room for you. Switch to the high power objective this is the longest one. You should draw it to scale, meaning it should take up as much of the circle in your drawing as it does when you view it. She smiled and told me to twist the eyepiece and watch. Drawing: Using the space below, carefully draw your Elodea at all three magnifications. What steps must be taken before attempting to use the high power? I can look at many different levels by focusing on each different level. Make your own prepared slide with mounts of your choice of specimen on glass microscope slides.